Storism Setup Guide
Install Storism on Shopify
Add the stories you prepared in Studio to your Shopify homepage.
Steps on this page
Before you start
Keep Studio and Shopify open in separate tabs
Use a desktop browser. Follow this guide while switching between Studio and the Shopify admin. You do not need to install a Shopify app.
- Prepare a published collection, stories, and media in Studio.
- You need a theme that supports Custom Liquid and permission to edit that theme.
- The company owner or an administrator manages allowed domains in Studio.
STEP 01
Copy your embed code in Studio
Choose the collection you want to display and get its own installation code.
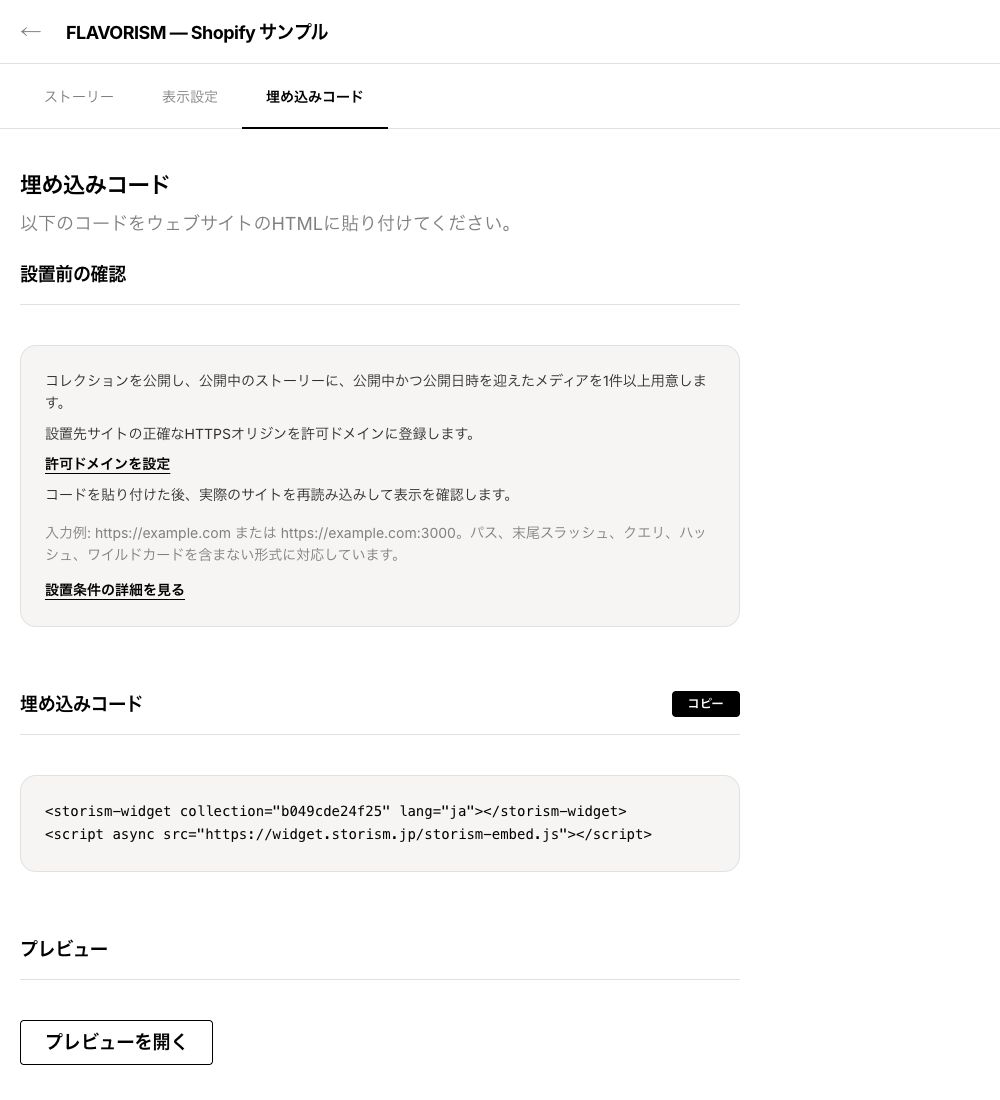
- Log in to Studio, choose Collections in the sidebar, and open the collection you want to install.
- Open the Embed Code tab and select Copy at the top right of the code box.
- Leave this tab open. You will use the Shopify admin in another tab for the next steps.
The collection and stories must be published, with at least one published media item whose publication time has arrived. If you have not added content yet, prepare it in Studio first.
STEP 02
Find your Shopify store URL
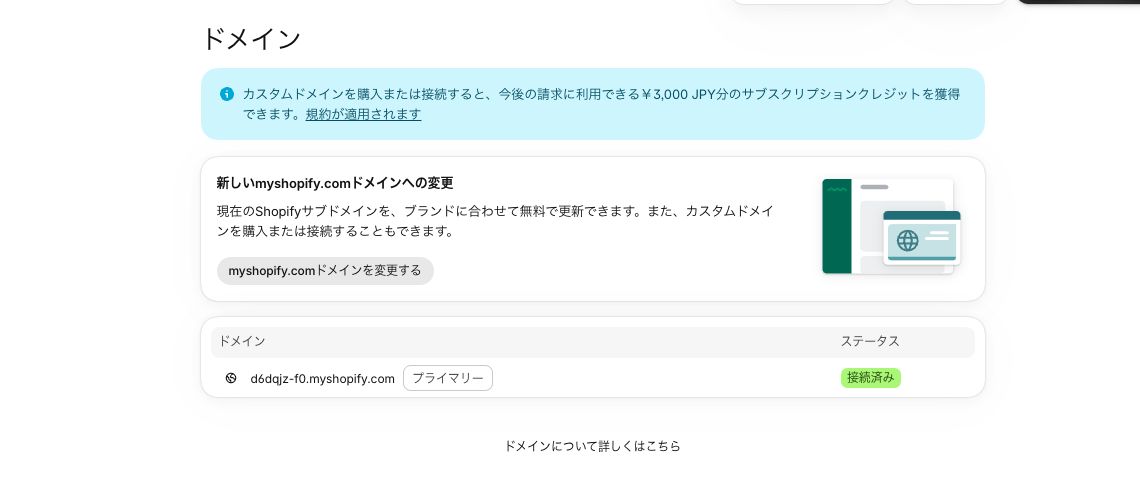
Find the address customers use to visit your store. This is different from the Shopify admin URL.
- In the Shopify admin, open Settings at the bottom left, then choose Domains.
- Find the domain marked Primary for your online store. If you use a custom domain, use that domain.
- Add https:// before the domain. Leave off a trailing slash, page paths, and anything after a question mark.
Domain formathttps://your-store.myshopify.com
For a custom domain:https://www.example.com
Replace “your-store” or “example.com” with your own store domain.
The address shown in the screenshot is a sample. Use your own store domain. You do not need to purchase or change a domain for this setup.
STEP 03
Add the store to your allowed domains
Tell Storism that the widget may be displayed on this store.
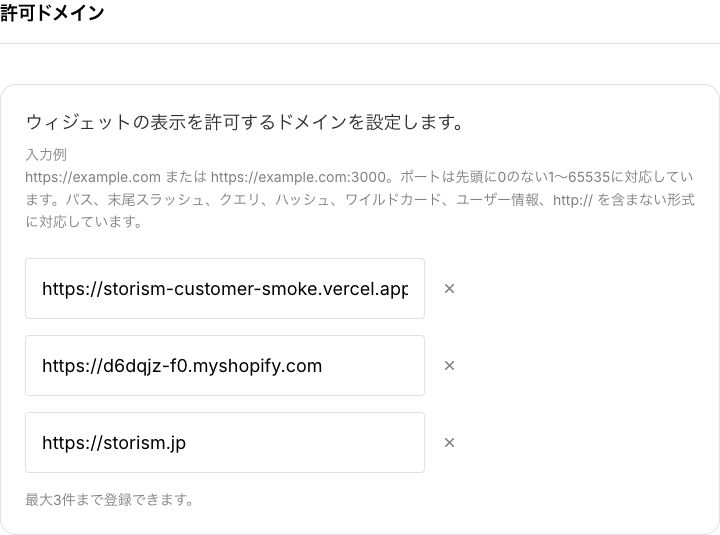
- Return to Studio and open Settings, then Company.
- Under Allowed Domains, select Add Domain and enter the URL from step 02. If there is already an empty field, use it.
- Select Save at the top of the screen. Check that the same URL is still shown after saving.
Only the company owner or an administrator can register domains. The number of domains depends on your plan. If the limit is reached, check for an unused registration before removing any domain that is still in use.
STEP 04
Open your Shopify theme
Open the editor for your homepage. A theme controls the design of your store.
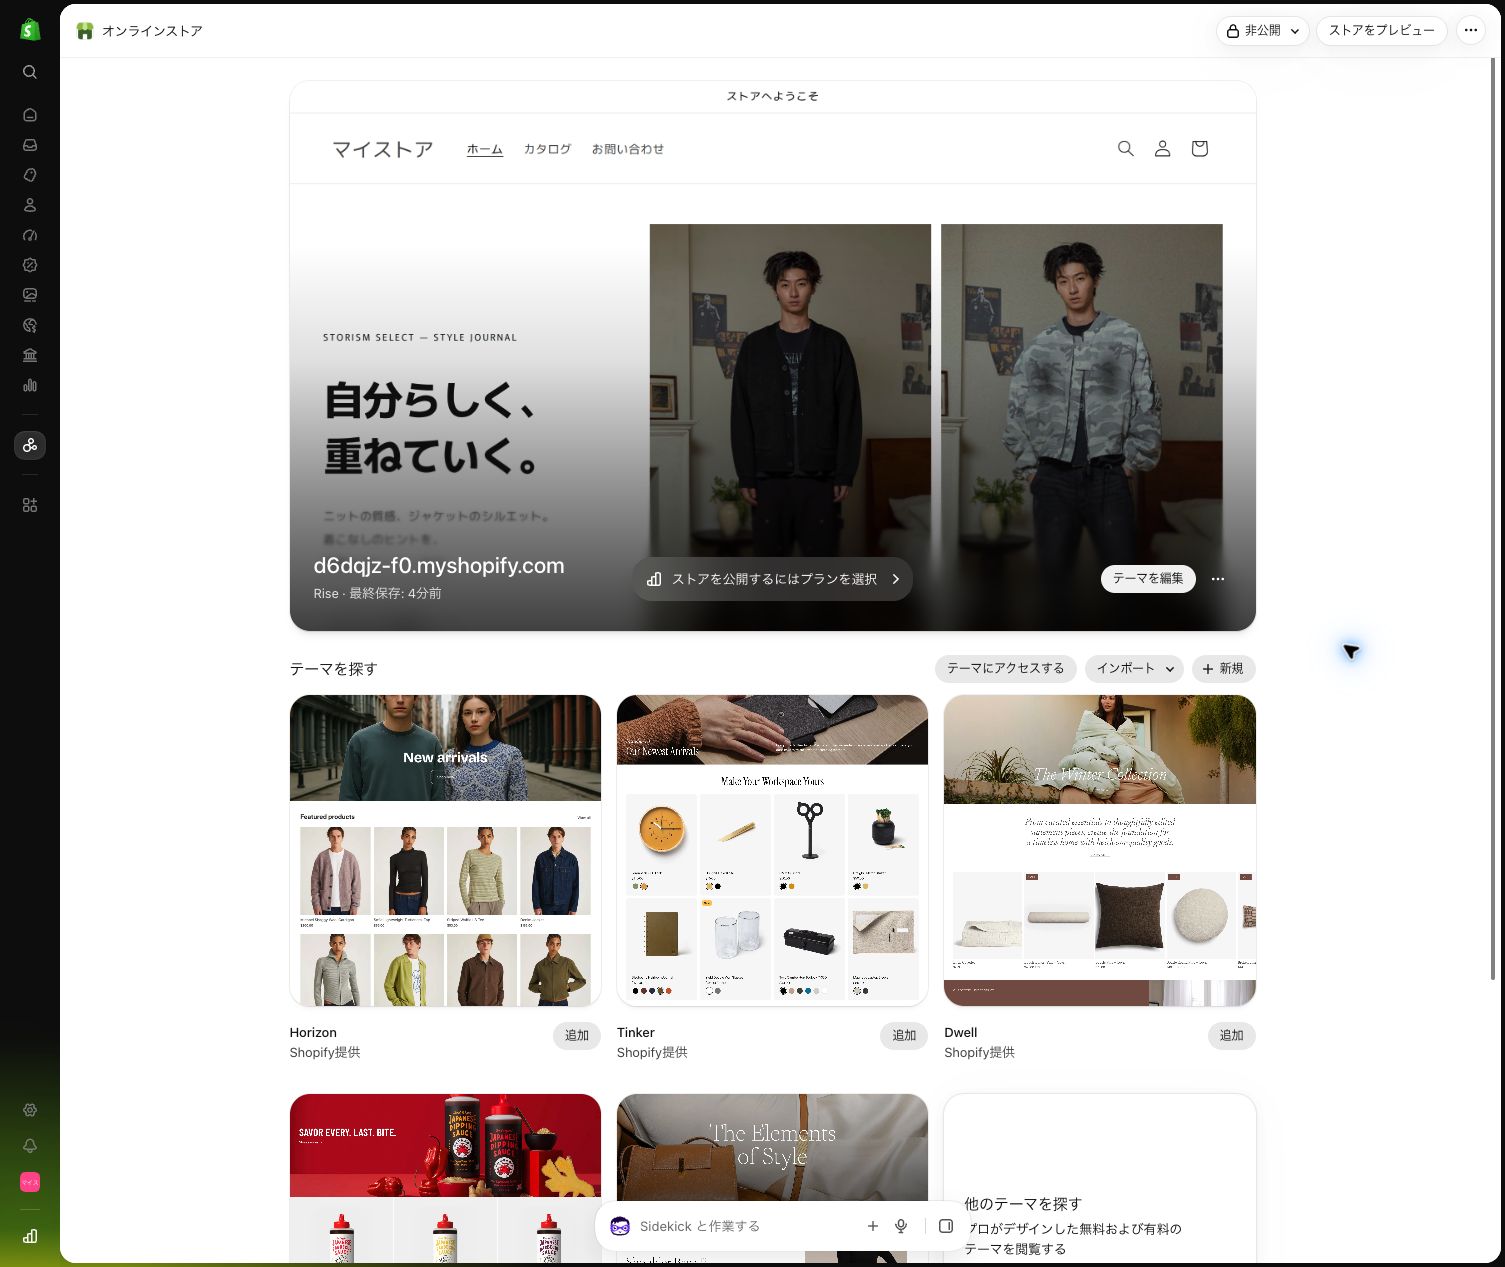
- Return to the Shopify admin and open Online Store under Sales channels in the sidebar.
- Select Edit theme on the theme currently used by your store.
- Check that Home page is selected at the top of the editor.
These steps add the widget to the homepage. Saving a change to the active theme updates the store using that theme. The screenshots show Rise 16.1.1.
STEP 05
Paste the code into Custom Liquid
Custom Liquid is a section for adding code. Paste both lines you copied from Studio into this section.
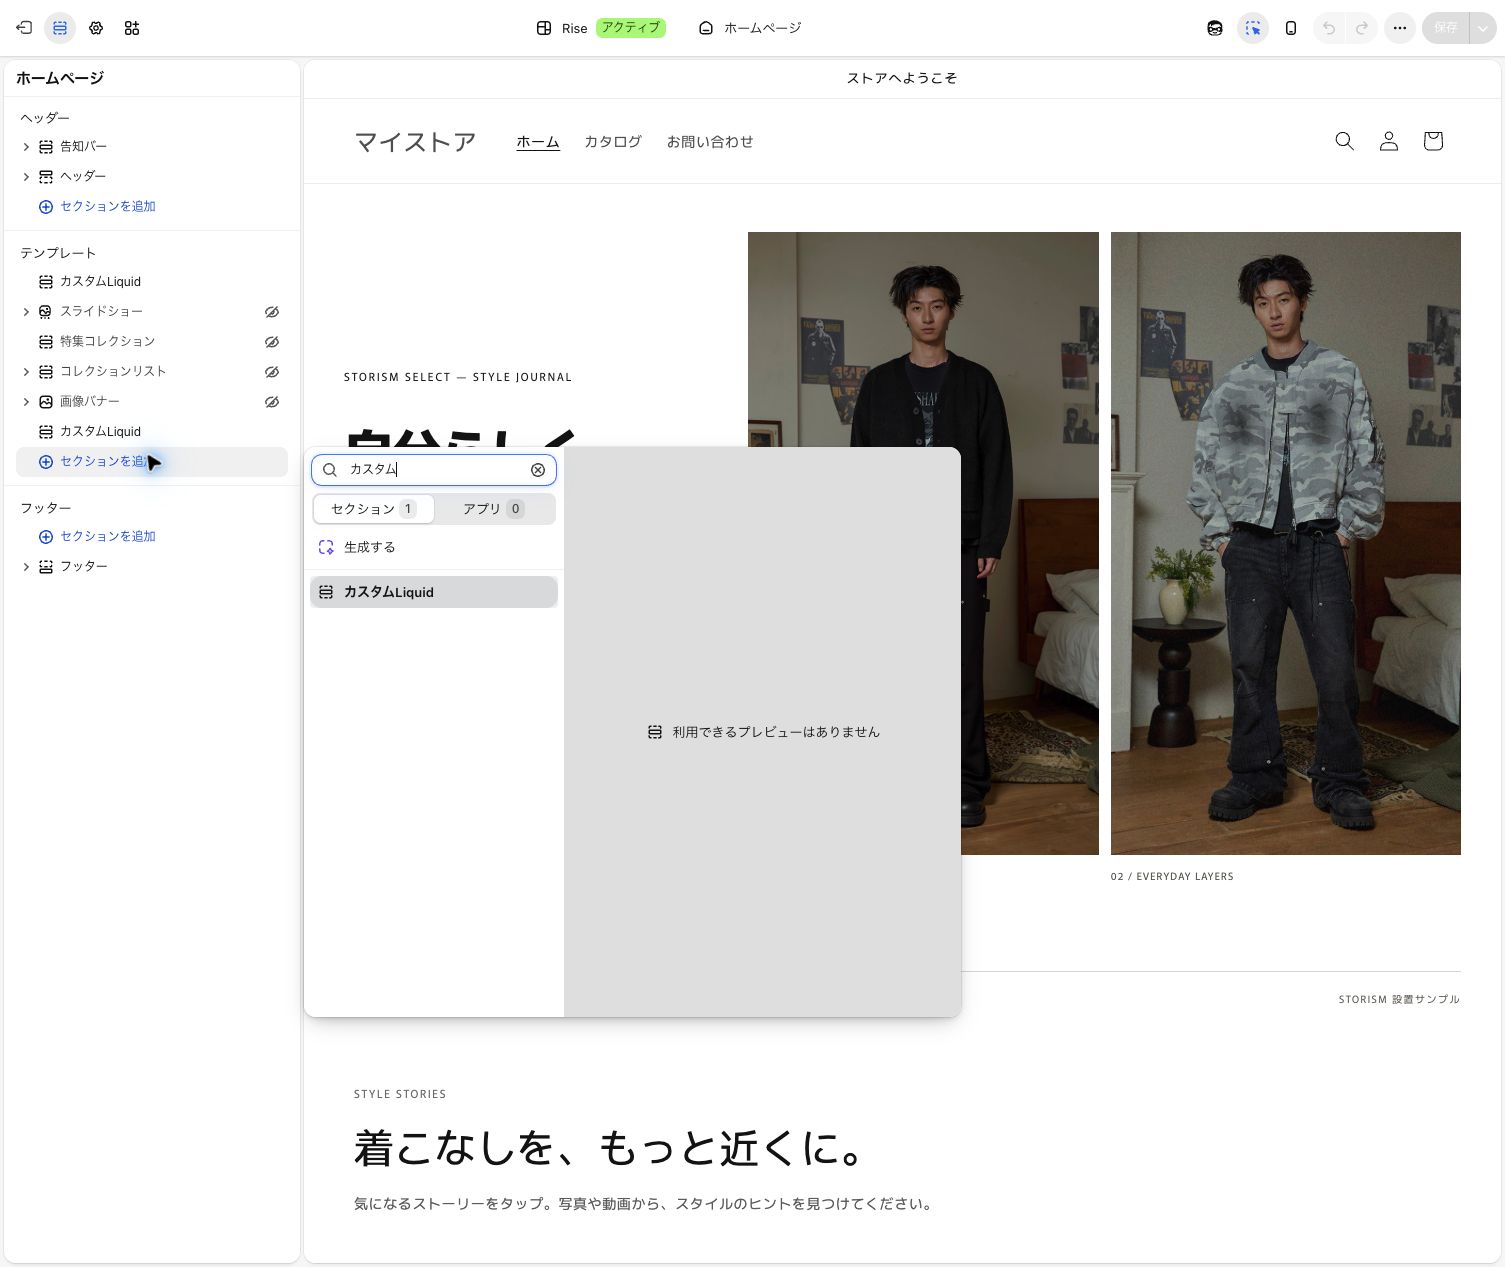
- In the Template area on the left, select Add section at the position where you want the stories to appear.
- Search for “custom” and choose Custom Liquid. In the Japanese screen shown, search for “カスタム”.
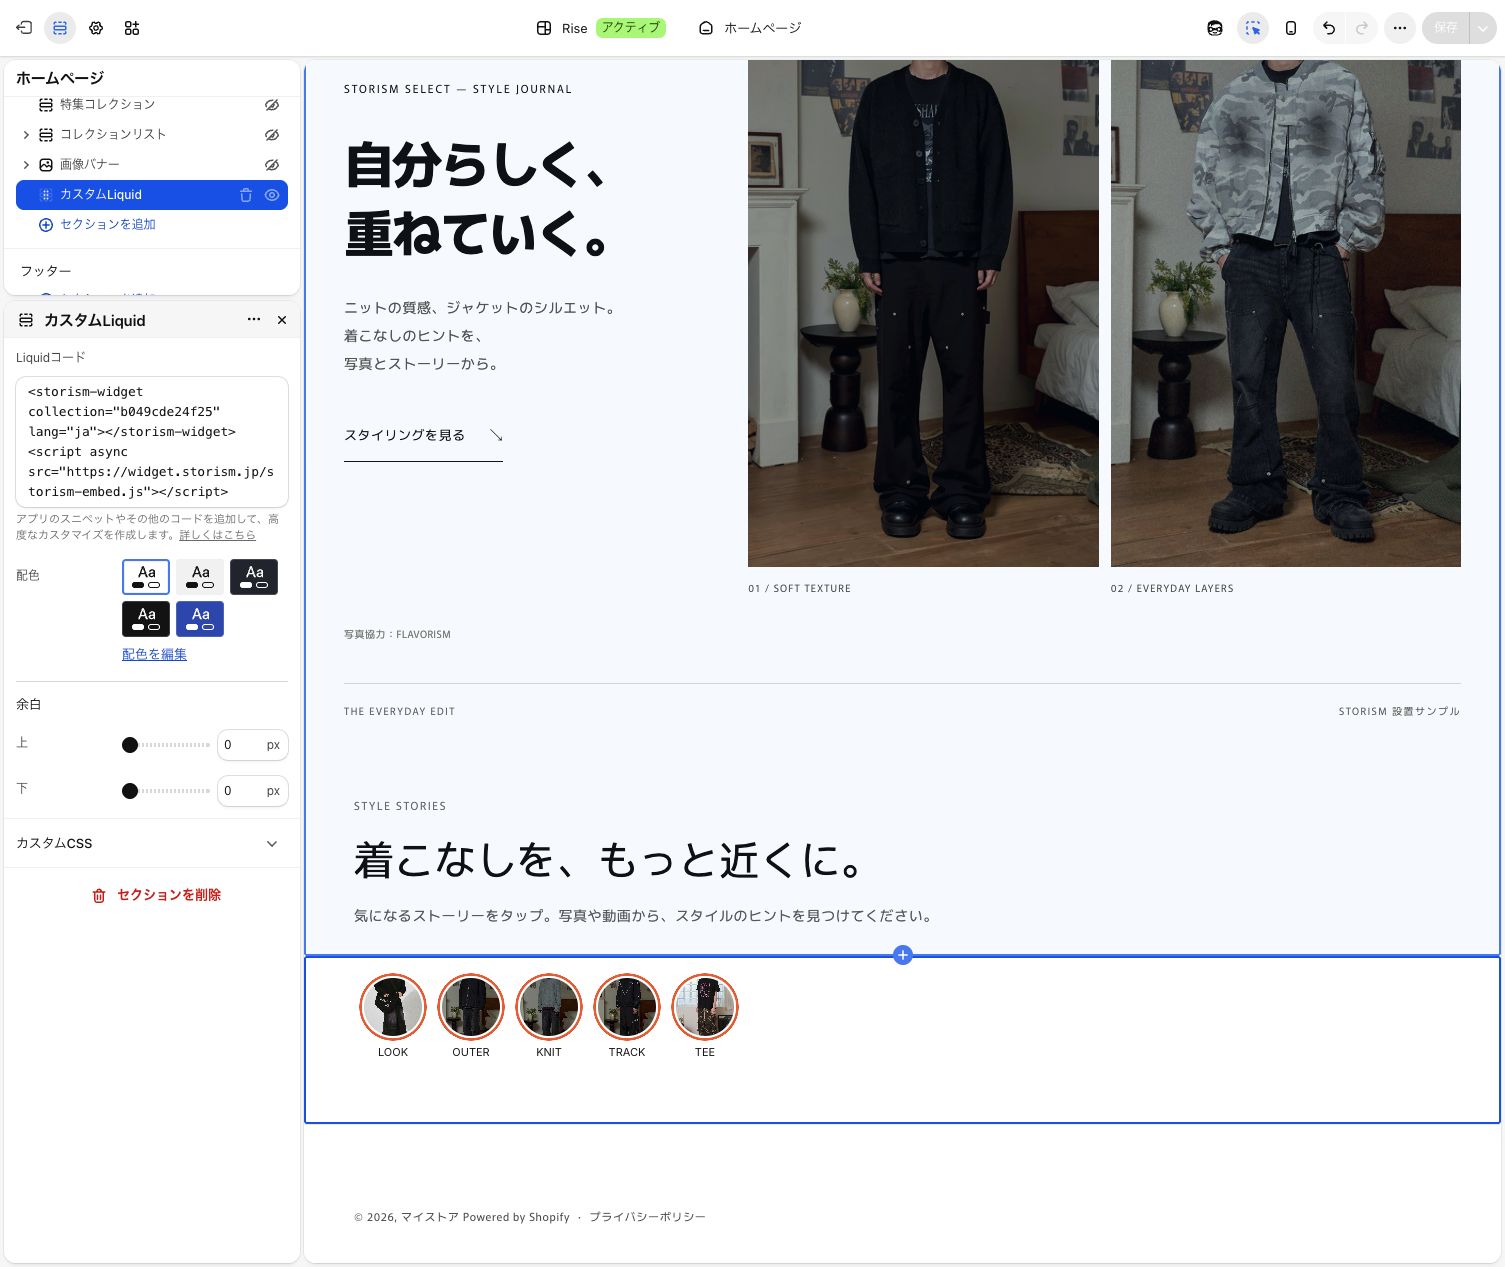
- Return to the Embed Code tab in Studio and select Copy again. Back in Shopify, paste both lines into the Liquid code field of the section you added.
- Select Save at the top right and wait until saving finishes.
Where to paste the codeUse the Liquid code field in the Custom Liquid section. The Custom CSS field and the Edit code screen are different tools.
Copy both lines: <storism-widget …> and <script …>. Use Copy in Studio instead of typing the code by hand.
The header and footer also have Add section controls. To place the widget in the homepage body, choose a position inside Template. A heading or description is optional. The installation code consists of the two lines copied from Studio.
STEP 06
Check the widget on your store
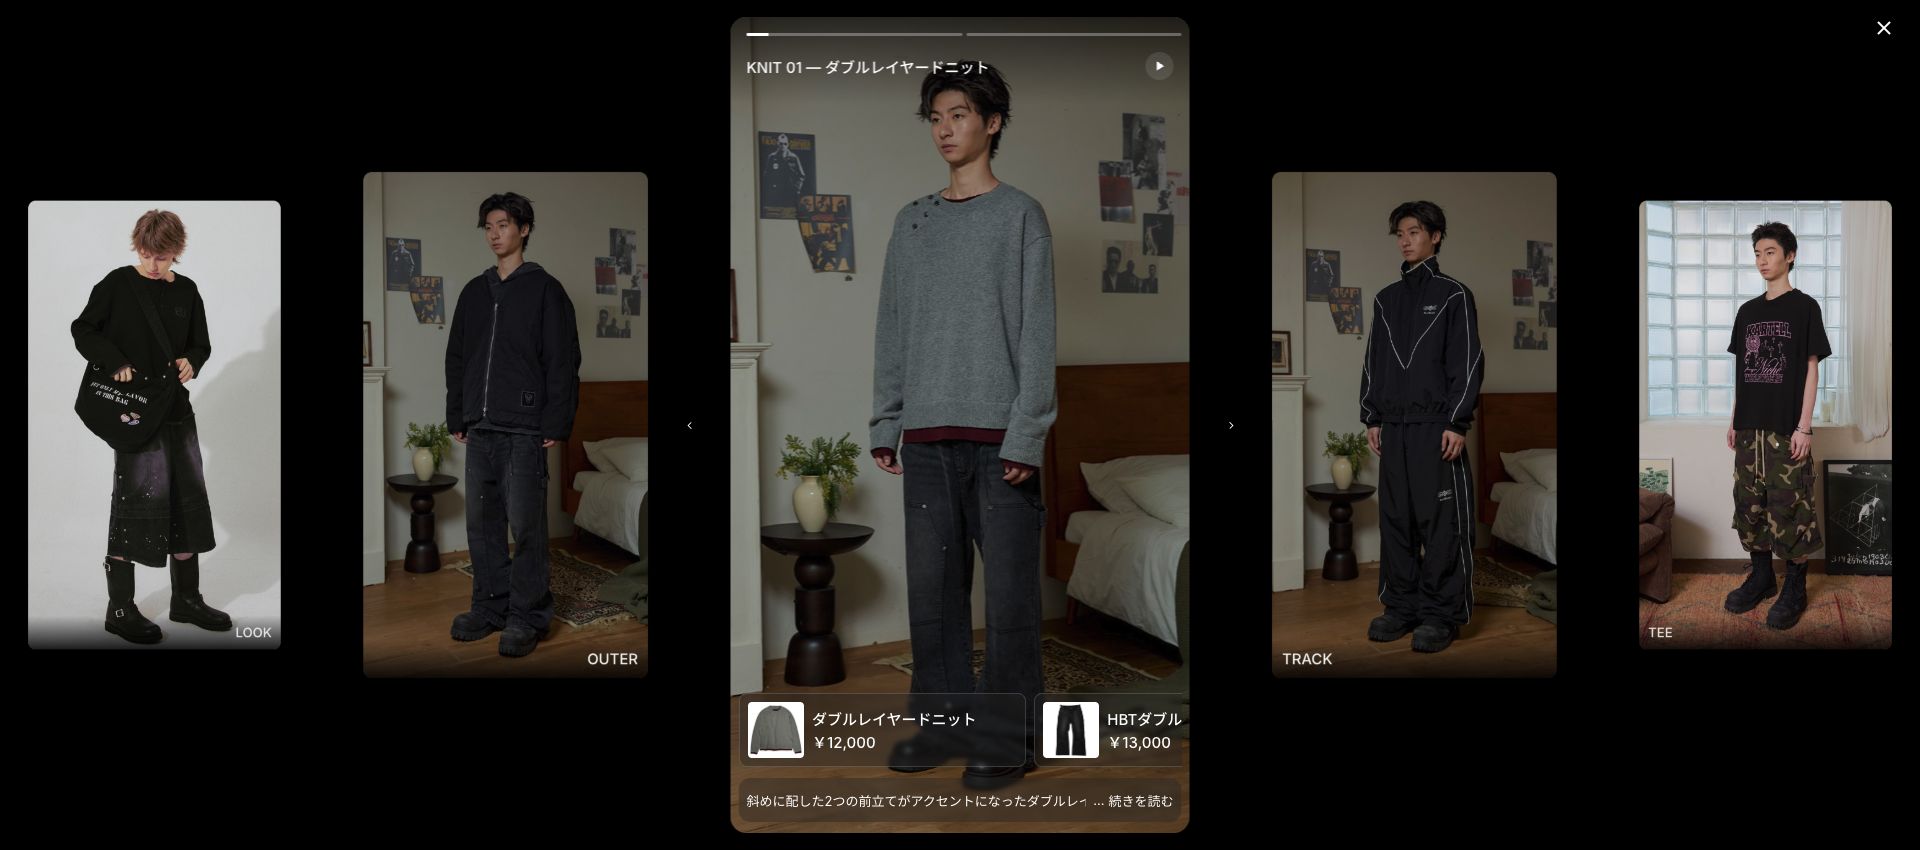
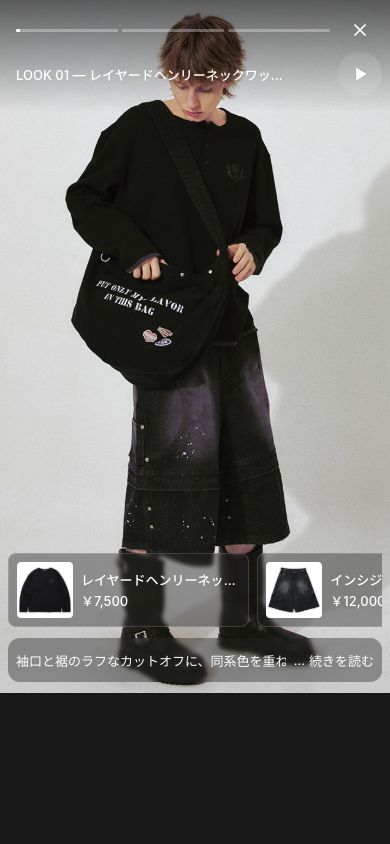
The setup is complete when the circular story images appear and a photo opens when you select one.
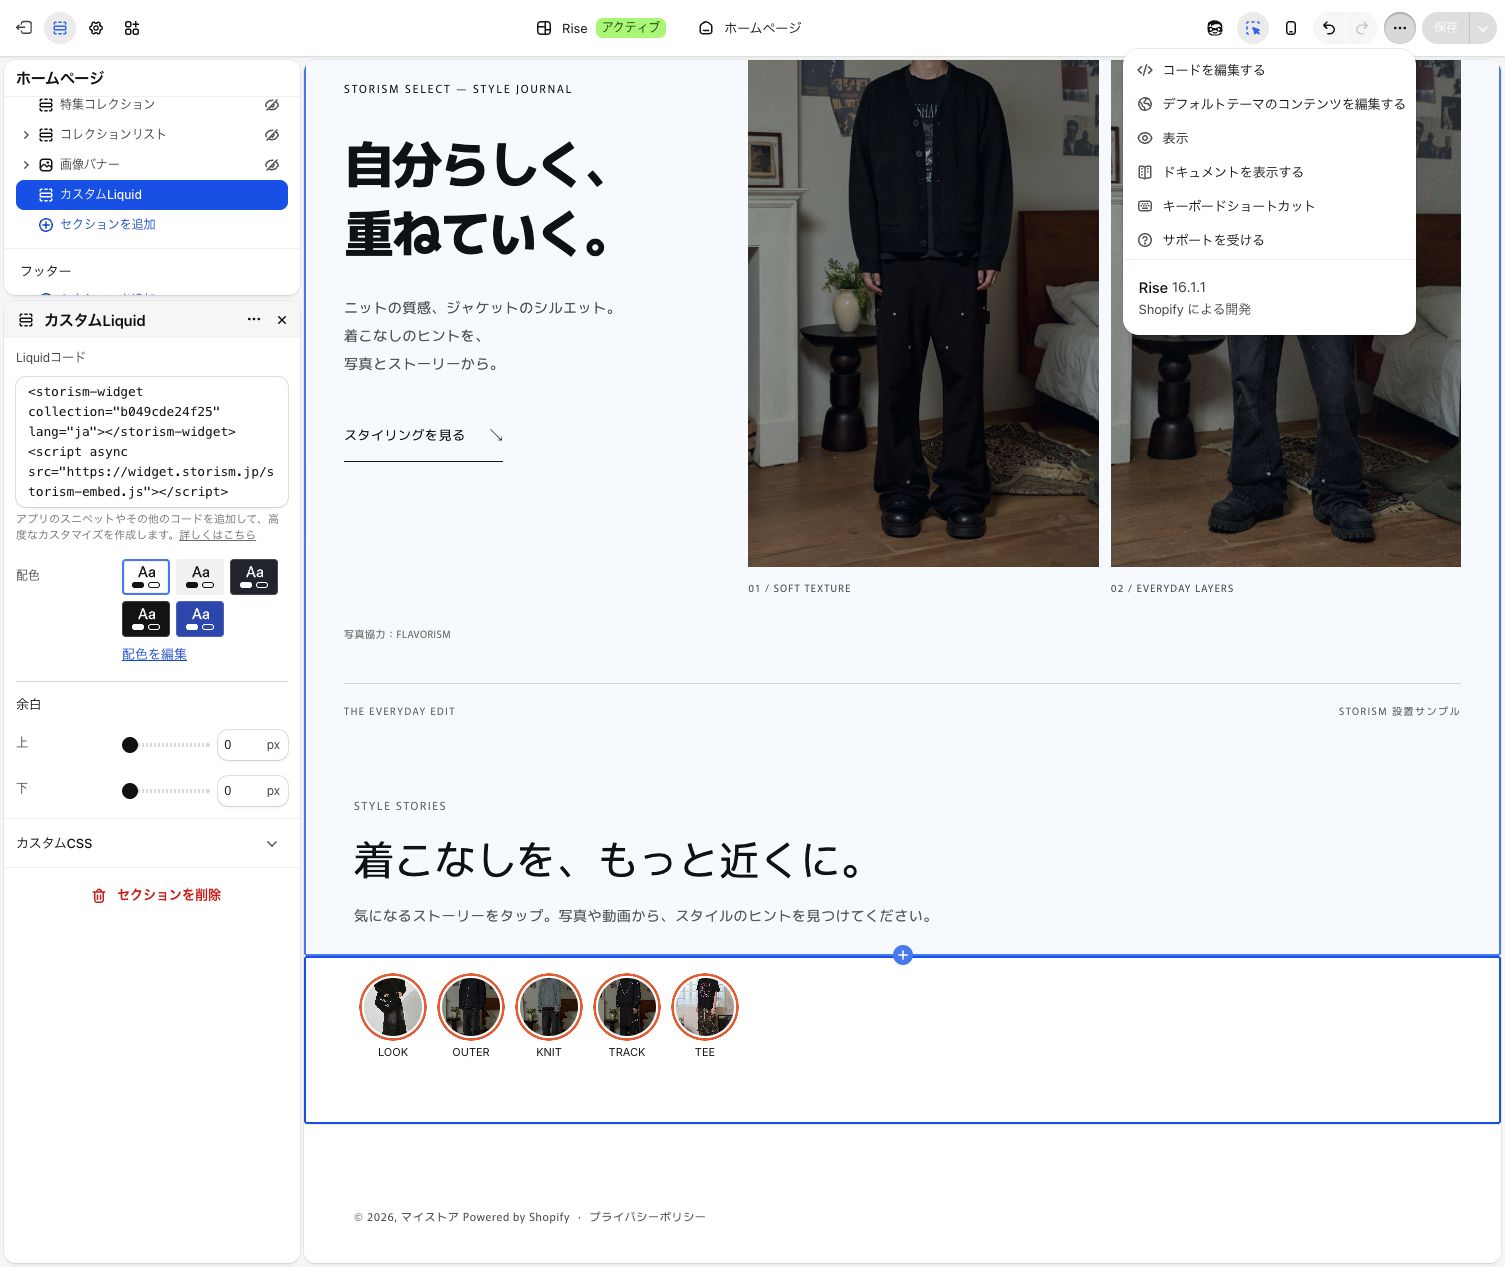
- Open the … action menu at the top right of the theme editor and choose View. The store opens in another tab.
- Reload the store page and check that the circular story images appear where you added the section.
- Select a circle to open a photo. Select the right side to advance to the next media item, then use × at the top right to return to the store.
- Open the same store on a smartphone and check that the widget appears and opens and closes correctly.
If the store is password-protected, for example during a free trial, you can check it using the store preview opened from the admin. Installing the widget and opening the store to the public are separate steps. If the theme editor preview differs from the store, check this actual store page first.

Troubleshooting
If the widget does not appear
Check the following items in order to narrow down the cause.
- Custom Liquid is not listed
- Search for “custom” in the Sections side of Add section. In the Japanese screen, search for “カスタム”. If it is not listed, check whether your theme supports Custom Liquid; available sections depend on the theme.
- The circular story images do not appear
- Check that the collection, stories, and media are published in Studio and that the media publication time has arrived. Then check that the domain of the open store matches an allowed domain, confirm both code lines were saved, and reload the store.
- It works in Studio preview but not on the store
- Studio preview does not check your store’s allowed-domain configuration. Compare the actual store address, including https:// and the domain, with the registration. Addresses with and without www and different subdomains require separate registrations.
- The widget appears in the wrong place or appears twice
- Check the section position inside Template and how many sections contain the same code. Drag sections in the left-hand list to change the position, then save.
- The widget disappeared after changing themes
- The code is saved in the theme where you added it. After switching to another theme, repeat steps 04–06 for that theme.
If you still need help, contact support (opens in a new tab) with your theme name, store URL, and a description of what you see. Do not send your login password.